
 |
|
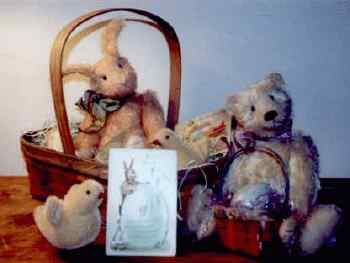
"Eggspress"
© Maria Pahls 2000 Order a Print |
the Seed Pod #75 Spring 2000
© Copyright 2000 Maria Pahls
the fence post
(editor's letter)
dear friends:
spring and all it's newness never cease to amaze me- green just seems to creep back over the gray winter landscape and color returns with the first spring bulbs awakened by a soft rain and gentle sun. the breeze still is crisp and the air seems sweet with promise of new beginnings. before long robins will return to lay their first clutch of sky blue eggs and the sounds of hungry hatchlings will fill the tree tops.
spring naturally lends itself to "out with the old and in with the new" and is a great time to resolve to tidy your work space. while planning your calendar be sure to set aside time to try a new hand craft or learn something new by means of reading or a class. it's always inspiring to work with a different material or technique and often breathes life into other old techniques as you realize ways the new & old might play off each other or be combined. this issue features margo white, a well known rug hooker, perhaps her story will inspire you to try this wonderful medium.
there is no set rule that says primitives must always be dark and grungy, colors are welcome, especially in spring. bowls of painted wooden or brown craft paper eggs add a nice accent to any table or even set upon a chair. groupings of rabbits, ducks, lambs, or birds set off by a spring feather tree (in white or pale green) are also decorative.( i keep my sheep out from the crib set to use at easter time). this issue includes an instruction for making wool covered sheep to use for display or gifts. this season finds the stylish rag doll wearing muddied pastel frocks and pint size bonnets. samplers stitched with nursery rhymes or appliqued farm yard scenes also evoke spring.
those wishing to get a jump on the summer season might consider preparing over sized, sewn fruits of painted fabric. when sanded and antiqued, cloth pears, apples, strawberries etc. are sure to get lots of comments. they might be too big to fit in bowls, try tumbling groupings onto a mantle or shelf for a whimsical display. poetic verse written on with permanent fine tip marker will accent the pieces even further. perhaps you would like to take it a step further and intermingle large sewn, painted, sanded stars as well. they would be fun mixed in with the fruit or in their own grouping. the bigger the better.
may you be inspired by spring!
primitively yours,
maria pahls
tips & techniques
How to make an authentic primitive rug hook
by Diana Blake Gray*
As a sometimes tool maker for rugs and something of a jackleg wood carver (one needs handles) here are some basics for making an authentic rug hook that works (for example, carve the handle before the hook is attached otherwise you'll be stabbing yourself with the nail while carving). As I write, I'll refer to an old handmade hook of mine which I'll keep in front of me .
1. Select the right wood for the handle, just any old wood won't do. You'll need a hard wood or almost hard wood (walnut, oak and birch work best). *Never* use pines or other soft woods, they will split out! My old hook is walnut. The grain in the wood needs to be straight and the wood needs to be dry so that it doesn't split. Begin with a piece 1 inch (2.5 cm) square and about 3 inches long. Drill a small hole (1/8 to 1/16 inch) in the center of one end. The hole should be at least a 1/2 inch deep. (Without the pilot hole, the wood will split.) If you prefer use 1 inch hardwood dowel to save a lot of carving time.
2. Carving the handle. Round the corners, and taper the wood to about 1/2 inch round at the end with the hole drilled. Carving hardwoods takes a very sharp blade (keep a sharpening stone nearby or for more modern carvers an X-ACTO brand carving knife with curved X-ACTO blades work great). I also keep a handy supply of bandages nearby. If you aren't good with a knife, use a wood rasp. It takes longer and purists would object, but it is not quite so hazardous.
When the shape of the handle feels good in your hand, sand it smooth. Use 100 grit sandpaper to start and finish the handle by sanding with 200 grit. Wipe all of the sanding dust off with a tack cloth. Oil the handle with linseed oil and let dry at least overnight.
3. Fashioning the hook. In the 1840's nails were made by blacksmiths of iron, and they had four flat sides. These nails were a bit wider at one end, tapering to the other, and they didn't have a 'head'. Old nails weren't round and even like today's nails. The wider end of the nail was used to make the hook since there was more metal to work with.
Clamp the nail in a vise and use a metal file to file the end of the hook to the right size and then file a point on the end for the hook. Then file in the 'V' part of the hook. (If you don't do this in the right order, you'll probably just break the end off the nail.) Old hooks didn't have an inset notch, the edge toward the hook was at more of a 90 degree angle, with a taper toward the handle. (They aren't as easy to use as modern hooks with the deeper notch.)
If you can't find an authentic old fashioned nail, use an eight penny (8d) or sixteen penny (16d) finishing nail, and file the hook from the 'head' of the nail.
Upscale hookers had hooks made with a brass rod instead of the iron nails. Brass wasn't quite as hard as iron, and the rods were already round so filing a hook in the end was easier. If you can find brass rod you'll have to file a hook on one end and a point on the other end to go into the handle. (Hint: look at the hardware store for repair kits for toilet tank fittings, since mostly brass rods are used to connect to the float valve. Just cut off the threaded ends.)
4. Putting the hook together. Place the hook vertically in a vise, with the hook part down. Place the handle with the hole on the end of the nail. Make sure you are holding them perfectly straight, and then *tap* the handle gently onto the hook, using a wooden mallet. (Don't pound the hook into the handle or you'll ruin it!) If the handle "fights" take it off and drill a little bit bigger pilot hole. Don't "fight back" with the handle or you'll split the wood. The handle should be tapped down at least a half inch onto the hook. (You should be able to *feel* when it wants to stop at the end of the pilot hole.)
5. Reinforce the end of the handle. Remember that when you are using a rug hook, you'll be exerting leverage on the hook which will tend to want to split the wooden handle. This is especially true of handmade hooks which have fairly large shanks. You need to reinforce the wood where the shank enters it. The 1840's way to do this was to use narrow strips of *wet* rawhide, wrapped around the handle and the ends of the rawhide tucked underneath the wrap. When the rawhide dries it shrinks and holds the shank and handle firmly together. (After the rawhide dries, it can be varnished for a smoother surface.) You can also reinforce the joint by wrapping it tightly with heavy waxed linen thread or with a fine metal wire.
All of the tools I've mentioned were around in one form or another during the 1840's, though many weren't widely available (for example small drill bits were hard to come by), but the process is certainly authentic.
* for more information see spider web under "rug makers homestead" article reprinted with permission. for old fashioned nails see listing for "vandykes"
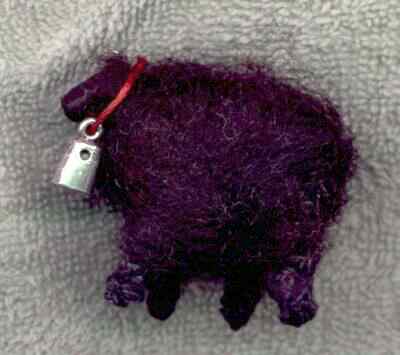
LAMBKINS
featured project
these 1½" H x 2¼" L lambs are a nice little touch to your spring decor. made with real fleece they have an "old time" look to them that begs to be touched.
to make one lambkin you will need:
- 3/4 oz. super sculpey (or black,white or brown)
- wool /fleece in color of choice (clean: carded or raw)
- acrylic craft paint in color of choice (see directions)
- glue gun or other suitable adhesive
- wire: 30 gauge or heavier cut in four 3 1/2" pieces
- loopy yarn in same color as fleece (see sample)
- tiny bell on a bright piece of ribbon or dmc floss (see lamb sample)
*note these ingredients are for a small size lambkin, for a larger lamb use heavier wire and more of the polymer & other materials as needed.
STEPS
- form a ball from the kneaded polymer.
- begin to press ball between thumb & first finger at one end of ball. roll pressed area between thumb & finger to round for the head/neck. repeat for rump area leaving it larger and wider than the head side.
- bend cut wire to 1 3/4" long by making a tight, high-sided U shape. insert the U wires, with points up, into the under side of lamb for legs.
- add the facial features by using a craft knife or modeling tool to press a V for the nose and a small line under the V for the mouth opening. the ears are made by lifting up a bit of polymer on either side of the face. press gently to round then model around and under the ear to smooth with modeling tool or tooth pick.
- bake upright according to polymer manufacturer's directions. cool completely.
- paint the body of the lamb in color of choice. for white lamb use off white or black paint for face. for black lamb use black for body & face. for brown use brown, etc. do not paint wire legs. if your polymer is the same color as your fleece you need only paint the face and neck.
- when paint is dry wrap the U shaped wires with loopy yarn.
- a. thread a large needle with loopy yarn (about 16in.)double yarn and knot the end. pass needle thru the wire U at the center/bottom and thru the loose knotted end of the yarn. pull to secure at bottom of wire U.
- b. holding the knot of yarn in place, bring the thread around one side of U and pass thru the yarn near the knot. continue to wrap around wire U alternating over and under and each time pass the needle thru the thread in the center of the wire U. work up the entire leg.
- c. once the wire U is no longer exposed, tie off yarn at top and hide knot on inside of leg. hide lower knot if visible by pushing thru to back of leg.
once all 4 legs are complete, spread out the piece of fleece into a 1/4" to 1/2" layer. put a dot of glue on lamb's back at base of neck and attach center top of fleece on glue. wrap the both sides of the fleece around the neck to meet on the chest, securing first side to polymer with glue. secure second side to fleece with glue. repeat for rump. pull remaining fleece between front and back legs around the sides and secure with glue on underside. (see X's on diagram).
trim the wool/fleece with small scissors to shape. add collar & bell if desired.
*fleece is available from magic cabin dolls, but it comes in 1 lb batts. that's gonna make a lotta sheep!

WHO'S IT?
WHAT'S IT?
candling to examine (an egg) in front of a candle for freshness.
candle wicking
1. soft heavy cotton thread similar to that used to make wicks of candles.
2. embroidery made of tufts of candle wicking.
hook and eye a clothes fastener consisting of a small blunt metal hook with a corresponding loop.
darn to mend by weaving thread or yarn across a gap or hole.
darning egg an egg shaped object used to hold the shape of the item being darned.
spring house a small house constructed over a spring and used to keep food cool.
swift 1. a cylinder on a carding machine.
2. a reel used to hold yarn as it is being wound off.
yoke a cross bar with two u -shaped pieces that encircle the necks of a pair of oxen, mules, or other draft animals working in a team. a frame of cross bar designed to be carried across a person's shoulders with equal loads suspended from each end.
easter eggs the word "easter", and the easter bunny

the historic symbolism of the egg spans through many centuries and is seen in many cultures. the modern custom of richly colored eggs and egg shaped treats owe their beginnings to ancient peoples and their religious beliefs.
early greeks, persians, and chinese were among those that exchanged eggs as gifts and held them as symbols of continuing life. in both pagan and early christian cultures the egg also held symbolic meaning.
eggs, considered sacred to many ancient civilizations, functioned as part of religious ceremonies in egypt and the orient. as a symbol of regenerative life, dyed eggs were hung in egyptian temples, the coloring of eggs was also a part of a babylonian mystery religion.
the earliest forms of easter egg and easter rabbit/bunny symbols might be linked to the norse goddess ostara. her two symbolic signs were the hare and the egg, both representational of fertility. ostara is also one possible origin of the word "easter". other spellings of the goddess ostra's name include eostre or eastre - derived from the ancient word for "spring".
another interpretation is based entirely on a translation error from latin to german. the frankish church held a festival in celebration of jesus' resurrection. the name of the festival included the word "alba" ( latin for "white" and in reference to the white robes worn during the proceedings). the word alba had dual meanings, "white" and "sunrise". the later (incorrect translation in this case) was used in conversion to the german language. when written in german "sunrise" is "ostern". ostern is another proposed origin of the word easter.
a scrap of rug hooking history
though few samples of the earliest hooked rugs remain today, it is believed that rug hooking must have begun some time around 1850 in north america. it was at this time that a common rug backing, burlap became commercially available. examples of hooked rugs in great britan appear late in the 19th century.
the rugs, kept near the bed or other low traffic areas served as a buffer against the poor insulation and cold wooden floors.
scraps of tattered clothing, considered too valuable to waste, were recycled into rugs (both hooked and braided) along with patchwork quilts. the rugs, made to be used and not thought of as art, were replaced as they wore out- therefor few were preserved. (as a source of warmth) quilts were probably made in more abundance than rugs until wood floors replaced ones of dirt. dirt floors and their likelihood to be damp would have caused rotting on untreated floor coverings such as cloth rugs.
hooking was advanced through use of the embroidery hoop. this technique spread rapidly along the atlantic coast. because of their often isolated homesteads the remote communities of north american rug hookers developed unique styles within their own regions.
when we think of hooked rugs today, we associate wool strips with their creation. earlier rugs composition would have depended on the maker's proximity to a wool mill. in many cases the early rugs were made of cottons, linens and linsey-woolsy. the richer homes might have had excess wool to hook as rugs. homes of lesser income would not have sacrificed an entire wool garment to rug strips. wool coats would have recycled into smaller garments (vests or jackets) and those into still smaller garments (hats), until there wasn't much left. later, the coming of the rail road made wood for floors and wool for rugs much more accessible.
the Canadian Museum of Civilization currently holds one of the most impressive collections of hooked rugs. these 400 rugs date from mid 19th century to present times.
*source
"Rugmaker's Homestead"
FEATURED ARTIST
MARGO WHITE
artist interview with MARGO WHITE
"hooked on rugs"
SP: tell us margo, what first sparked your interest in rug hooking? and how did it evolve into the business of selling your hooked rugs?
MW: i started hooking rugs after taking a class, that was february of 1992. in 1994 i attended the wholesale valley forge pa show when i began making rugs for sale. i still participate in the valley forge show and two others in wilton, ct and hancock, ma. i have no formal art training. what i learned about color and design has been from experience, what i like, and inspired by antique rugs.
SP: do you come up with your own designs or work from motifs on old rugs that you see in books or museums?
MW: i design many of my own rugs and also work from antique pieces. when i work from an old rug i never trace the design off of it, instead i draw it free hand which adds a bit of change while still keeping the "feel" of an old piece. for all the rugs i draw a pattern and usually make plastic mylar templates that are cut and traced onto the backing.
SP: since you mentioned backing, tell us what you like to use.
MW: cotton monks cloth is my fabric of choice, i used to use linnen but developed an allergy to it. i find burlap is difficult to work with and somewhat messy.
SP: ...and for your wool strips do you use old clothing or buy new wool? i noticed that your work has quite an expansive range of color.
MW: all of my wool is new. much of it i dye myself. the tweeds and textured wool is used "as is". with recycled wool i have a concern about residual dry cleaning chemicals- i am making these rugs with the hopes that they will last more than my lifetime so starting with the best possible fabric is important.
SP: tell us about dying the wool, where do you do this?
MW: using either cuhsings or prochem brands of acid dyes, i dye in my kitchen. these dyes are formulated for use with wool and work wonderfully. i have very few written down dye formulas - most of it is done by eye. two different dye pots of the "same" color usually never turn out the same. these slight variations help to give the feel and look of the old rugs that have aged and faded.
SP: what are your favorite motifs for your rugs?
MW: my favorite rugs seem to be of cats and animals. early rugs that are the most valuable seem to be of animals such as the cat, also dogs, horses and chickens. these were the animals that were around when the early housewife was drawing and hooking her rugs.
SP: in the past year i have noticed rug hooking showing up on every thing from hooked doll faces and purses to christmas stockings and ornaments. how do you feel about the medium of rug hooking being translated in this way...do you think it enriches or detracts from the tradition?
MW: i have hooked a few doll faces and some foot stool tops along with some pillows, but rugs remain my favorite. to me hooked rugs look their best on the floor or hung like a piece of art on the wall.
SP: any thoughts on primitive and how it fits into your style?
MW: too many times when people say "primitive hooking" they mean sloppy. i hook in a primitive style with emphasis on simplicity. the style shouldn't compromise the rug, you need to hook in the correct manner to make the best possible rug.
editor's notes margo white's rugs cost $750 retail for a 24" X 36" average sized piece. she holds two rug hooking camps along with sandy kandris in july (shaker village, pleasant hill KY) and october (shaker inn, enfield, NH) see burlap sack for her address. margo has sold her work to the folk art museum in new york and she has been on the early american magazine's master craftsmen lists for the last several years. the recent issue of rug hooking magazine has a feature article and her rug "the beast" on the cover (may 2000) she also sells wool both hand dyed and "by the bolt". you can also contact her about kits from her patterns.
burlap sack
margo white
653 east russell lake dr
zionsville, indiana 46077
ph: (317) 873-6234
e-mail: Mwhiterugs@aol.com
VANDYKES
restorers ( have old type nails - for rug hooks)
p.o. box 278
woonsocket, sd 57385
http://www.vandykes.com
farm house
makers of unique folk art bird housing.
contact rick & virginia lachance
route 1 box 26
caledonia mo 63631
ph. (573) 779-3869
e-mail: farmhouse1807@yahoo.com
national paint coatings association
http://www.paint.org
lead hot line
(800) 532-3394
operated by the epa and national safety council
the national lead information center
(800) 424-5323
if your home was built before 1960 call for a publication on reducing lead hazards when remodeling.
magic cabin dolls
p.o. box 1996
prairie edge road
peoria, il 61656
(888) 623-6557
(they sell carded wool stuffing which can be used for lambkins it comes in a 1 lb. batt for $12.95 plus shipping item #16501)
book reviews
&
books of interest
American Primitive Hooked Rugs
by Barb Carroll and Emma Lou Lais
available exclusively from W. Cushing & Co.
$29.95
Call (800) 626-7847
A Rug Hooking Book of Days: Featuring the Fiber Art of Polly Minick
by Polly Minick
Paperback - 64 pages Spiral edition (April 1999)
Stackpole Magazines
ISBN: 1881982157
Basic Rug Hooking
by Alice Beatty, Mary Sargent
Paperback - 160 pages 2nd edition (March 1990)
Stackpole Books
ISBN: 0811723062
The Rug Hook Book
by Thom Boswell (Editor)
Techniques, Projects and Patterns for This Easy, Traditional Craft
Paperback (September 1994) Lark Books
ISBN: 0806983590
Country Rugs
by Pat Hornafius, Kay Carter (Illustrator)
How to Design and Hook Traditional Wool Rugs and Hangings
Paperback - 208 pages 1st Ed. edition (February 1992)
Stackpole Books
ISBN: 0811730425
The Complete Book of Rug Hooking
by Joan Moshimer Paperback
167 pages reprint edition (May 1989) Dover
ISBN: 0486259455
country nests and instructional painting book
by gail eads
available from http://sharonandgayle.com
see an overview at:
http://www.sharonandgayle.com/cgi-local/shop/detail.cgi?r=06401
also available from http://www.Artistclub.com
http://www.artistsclub.com/ac/Books/Cover.asp?ItemNo=33805&Cat=2
Treasury of Crazyquilt Stitches
A Comprehensive Guide to Traditional Hand Embroidery Inspired by Antique Crazyquilts
by Carole K. Samples, Carole K. Parks Samples
Paperback - 208 pages (August 1999)
Collector Books
ISBN: 1574327283
The Magic of Crazy Quilting
Complete Resource for Embellished Quilting
by J. Marsha Michler
Paperback - 144 pages (September 1998)
Krause Publications
ISBN: 0873416228
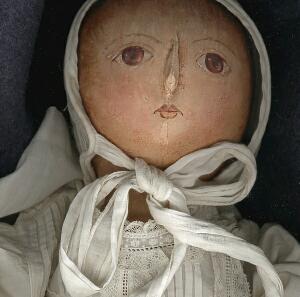
"Heritage Rag baby" by Shari Lutz

web sites of members & other sites of interest
"Rugmaker's Homestead"
http://www.netw.com/~rafter4
email rafter4@netw.com
fredricksburg rugs
offers directions on how to hook
http://www.fredericksburgrugs.com/fredericksburgrugs/howtohook.html
W. Cushing & Co.
Hooked rugs of Joan Moshimer
http://www.wcushing.com/
Hudson River Rug Hookers
http://www.bestweb.net/~syngie/
American Quilts On-Line
http://www.americanquilts.com
prose
spring spring, such a wondrous thing when many a heart and bird will sing and take to the air on feather light wing ah spring a wondrous thing
mp 2000
man is a history making creature who can neither repeat his past nor leave it behind.
w.h. auden
little minds are interested in the extraordinary: great minds in the commonplace.
elbert hubbard
true knowledge consists in knowing things, not words.
mary wortley montagu
know ye not, each thing we prize does not from small beginnings rise
mary ann lamb
did you know that the origin of the children's rhyme/dance "Ring Around the Rosies" has it's origin traced to the black plague?
here is a general translation:
- ring around the rosies: referring to the rose colored lesions associated with the plague that often formed a ring around the neck.
- a pocket full of posies referring to the held belief that if posies or groups of flowers were kept near the nose that the airborne plague would not penetrate the nostrils.
- ashes ashes we all fall down referring to the cremation of the deceased which caused further spread of the plague thru the ash filled smoke in the air.
|
|
All rights reserved. No part of this newsletter may be reproduced without written permission from the publisher, except by a reviewer who may quote brief passages in a review with appropriate credits; nor may any part of this newsletter be reproduced, stored in a retrieval system, or transmitted in any form or by any means -- electronic, mechanical, photo- copying, recording, or other -- without written permission from the publisher.
we make a large effort to get permission to list most web sites and company information and make every attempt to list them correctly. if you spot an error contact maria at: seedpod@fuse.net if you need to make a change contact maria.
copyright 2000 maria pahls~the seed pod all rights reserved. no part of this newsletter may be reproduced without written permission from the publisher, except by a reviewer who may quote brief passages in a review with appropriate credits; nor may any part of this newsletter be reproduced, stored in a retrieval system, or transmitted in any form or by any means -- electronic, mechanical, photo- copying, recording, or other -- without written permission from the publisher. photographs and articles posted on homespun peddler site by permission of photographers or authors and are protected under this copyright.
 HOME PAGE