The LCD view screen can be terrible!
|
|
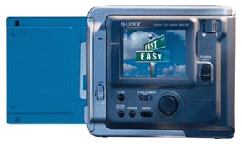
This camera uses an LCD SCREEN on the back for viewing
your scene prior to taking the picture.
(See the right picture on the top of this page.)
In general room light the image on the screen is bright
and beautiful.
In a dark room it gathers so much light that it's
better than your eyes.
Outside or in bright light, hoeever,
the image is INVISIBLE. There's simply NO WAY
to see the image in sunlight. There's an adjustment
to brighten the viewer but it can never overcome sunlight.
What's really bad is that you can't read ANY of the
settings or other information when outside.
This camera needs an optical viewfinder to supplement the
LCD screen. Or you need a black cloth over your head like
the early photographers used.
Getting good pictures takes practice.
|
|
This is not a "point and shoot" camera.
At least not if you want decent pictures.
You have to practice and learn what will and won't work.
Lighting is everything.
Difuse, even light is best.
Bright sun is a disaster.
Low light looks great on the LCD panel but the image
will be black.
Florescent lights actually work great because they
provide that difuse, even light!
With practice you can take some great pictures.
In most cases you'll still have to tune them up
with photo editing software.
We almost never get a picture good enough to publish to the
web as it comes out of the camera.
What you see is NOT what you get
|
|
As mentioned, the LCD SCREEN produces a beautiful
image (provided you're not outside).
But that's not what the actual picture looks like!
The final image is alway much darker than what the
viewer shows and too often
the image that's recorded comes out
almost BLACK!
The crazy thing is that the image data has all been
recorded. You can use photo editing software (as I did below)
to warm up the image but you lose a lot of contrast.
|
|

|

|
|
WHAT YOU SEE
The preview image in
the LCD is great!
|
WHAT YOU GET
But on the computer
it's very dark.
The Camera does NOT handle contrast well
|
|
Again, the LCD SCREEN produces a beautiful image in
almost any lighting conditions.
But if you're outside in bright sun,
the final picture is often terrible.
This is a case where you can't easily clean up the image
with software.
The details are there but to see them washes out far
too much contrast.
With practice you can learn what will and will not work.
Just remember that outside you'll be shooting blind because
you'll never see the image on the LCD if you're in the sun.
And even if you could see it, the LCD image is not what
your computer will show.
|
|

|

|
|
|
Great background.
But who's the person?
|
Good T-shirts
But they wipe out the wearers.
|
Bright colors are a problem
|
|
Bright, vivid colors seem to be a problem.
Reds in particular work poorly.
When photographing bright flowers the image
tends to look "posterized".
The contrast becomes excessive and the bright
colors look almost florescent.
|
|

The flash hardly helps
|
|
We've tried lots of things with the flash.
It almost never works.
If you're too close the image is overpowered;
if you're too far the flash has no effect.
We've yet to find an ideal distance.
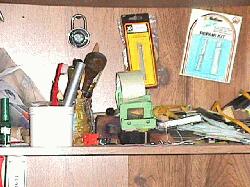
The two images below are the same subject and the
camera was mounted on a tripod about 8 feet from
the subject. Some zoom was used to crop the image.
The scene was illuminated by incandescent lamps
as well as overhead light.
As usual, the image in the LCD was fantastic.
It was better than looking with naked eyes.
Almost like having night vision equipment but with
perfect color, perfect contrast, perfect saturation.
|
|

|
|
|
WITHOUT FLASH
|
WITH FLASH
Pressing the button moves the camera
|
|
Everyone seems to have trouble with this.
Because you hold the camera away from your
face to see the LCD screen, there's nothing to brace
against when pressing the shutter button.
Pressing always moves the camera and
that can mess up an image.
We've learned two tricks.
First, use a tripod when you can and use the self timer to
snap the picture. That's seldom practical but it does work.
The second, and better, trick is to use the camera strap
as a "sling". We put the strap around our neck then push
the camera out in front of us as far as it will go.
The tension on the strap stabalizes the hands when the
button is pushed.
| | | | | | | | | | | | | | | | | | |




 HOME PAGE
 CONTENTS